Refinishing Wood Floors from 1914 | The Great Mistake
Welcome back! If you're stopping by for the first time, check out part one and part two for a little back story.
So before we get to the great misake, we get to talk about stain!!!! While Cole ran the sander, I had some time to research and experiment with finish options.
While lots of people suggested we leave the wood natural, we really didn't like the look of light floors contrasted with ALL the dark woodwork. Given all our trim has red overtones, the first few stain testers we grabbed were some kind of red.
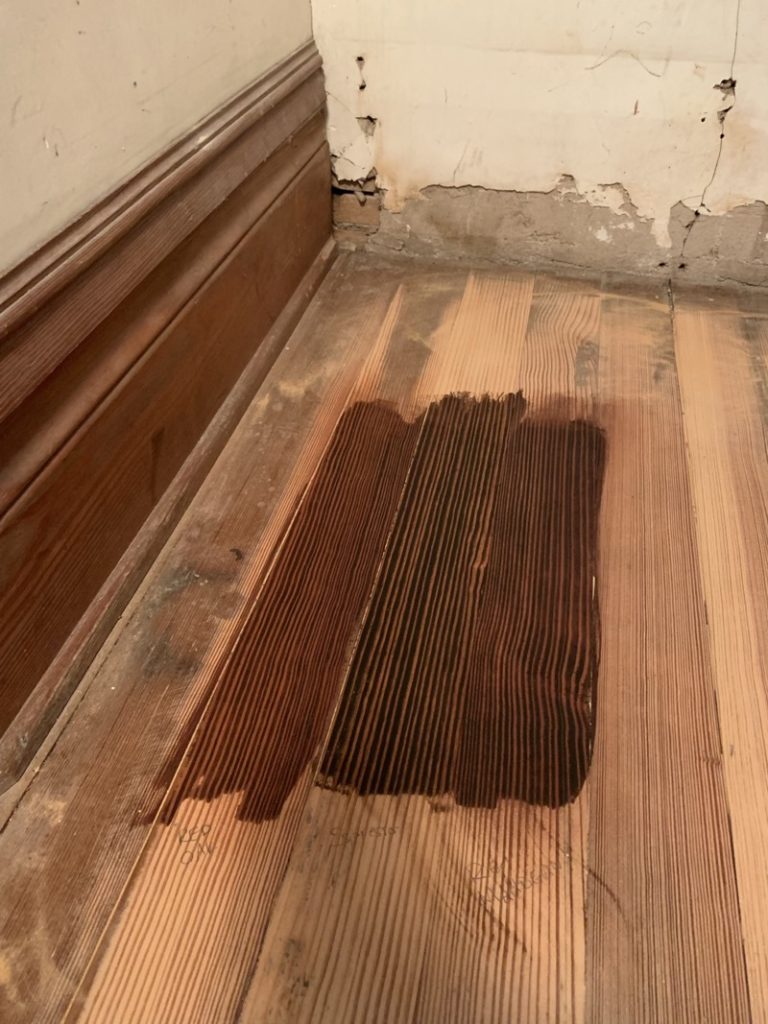
You're looking at Red Oak, Espresso, and Red Mahogany from left to right. Again, our assumption was that our floors were pine, which given our experience with pine, meant we'd need to add the red tones via stain.
We were surprised to find how stripey the floors looked. The long vertical grains were accepting the dark stain, but the floors themselves were staying light. So I started researching what was going on.
I couldn't find any modern floors that exhibited the long, straight grains we were seeing on our floors, and most pine floors had tons of knots. FINALLY, after much google searching, found a graphic that pointed me in the right direction.

Look! The Quarter Sawn examples looks EXACTLY like our floors! Woohoo!
We have quarter sawn heart pine floors! With that information, I started doing deeper research on how to make them the MOST beautiful.
"Heart Pine" is actually just the inside of a Longleaf Pine. Because it comes from the "heart," these boards have a nice red hue. The way they are cut determines the grain pattern.
These floors were in such high demand in the early 1900s, that these rich idiots used up all the Longleaf Pine in the country.
With this in mind, we started over with our stain choices. We grabbed Minwax Natural, Puritan Pine, English Chestnut, and Early American. Everything I read suggested Heart Pine floors would become redder over time, so adding more red via stain would be overdoing it.
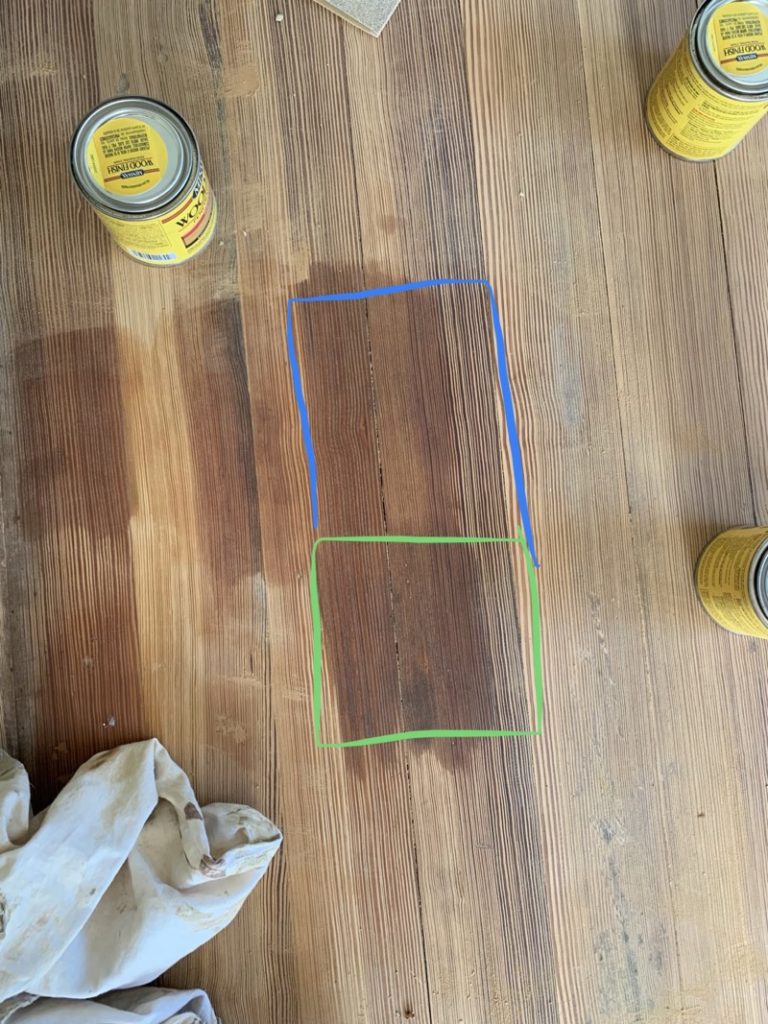
Blue is the Early American, green is English Chestnut. Natural and Puritan Pine are over on the left, but we don't care about those.
Ok, let's take a break and look at some internet drama.
During this process, I leaned heavily on the Facebook group Our Old House. It's given me great access to all kinds of people who have experience with loving on old houses. I posted pictures of our floor, my guess on the species of wood, and any recommendation on stain colors. (I didn't mention what stains we were considering)
So most people were like "leave them natural!! Don't stain!" (there are a LOT of purists on this page) and others recommended we use wood conditioner and Early American or English Chestnut (which was very affirming). BUT THEN this angry guy started mansplaining hard.

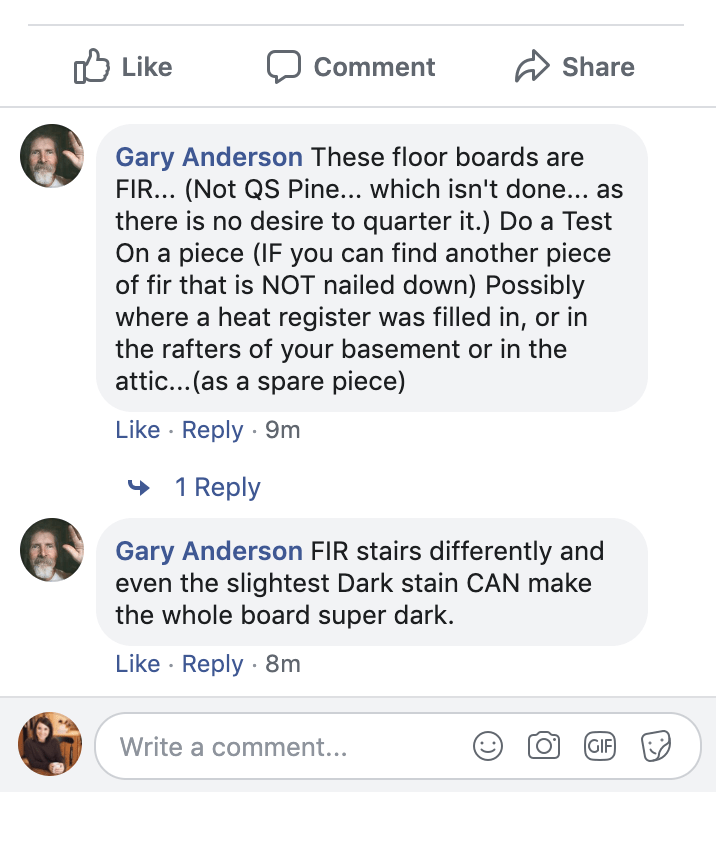

So while I usually appreciate feedback, this dude would not quit. Even after I stopped responding, he kept going. I was getting HEATED. Angry. WHO THE HELL ARE YOU BRO. IT IS NOT DOUGLAS FIR.
Then this comment came in.
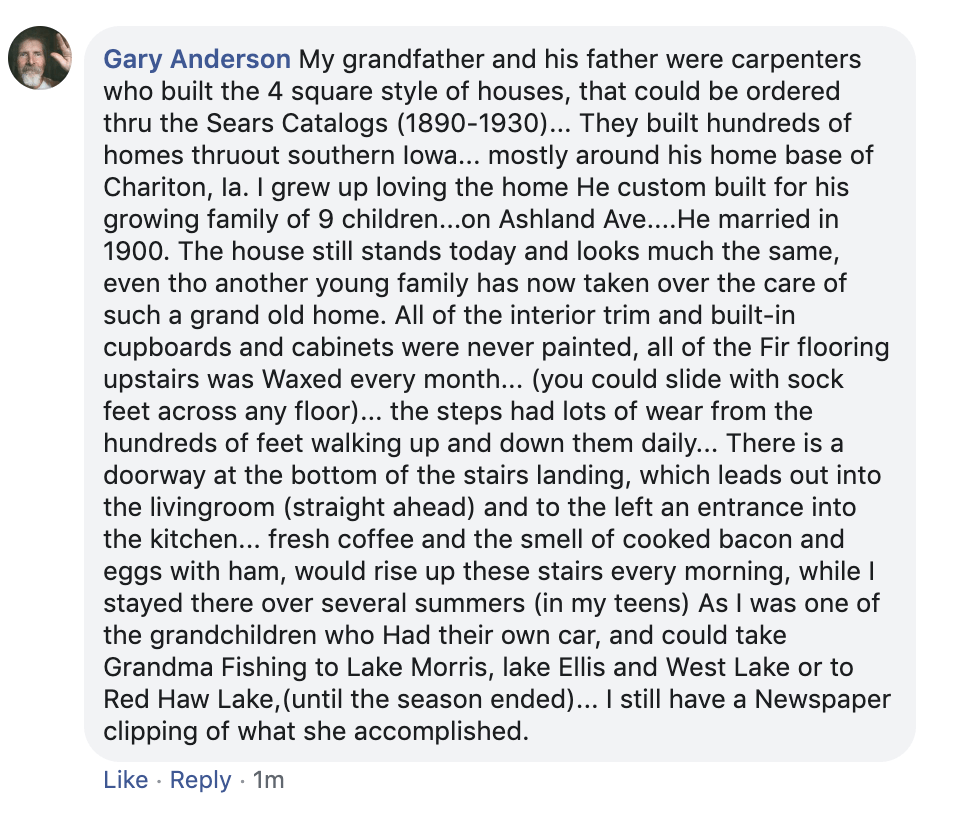
And then I realized, this guy just wanted to talk to someone. He clearly has a lot to say and thought maybe I would listen. So I did.
The lesson here, is internet hate isn't always hate, just loneliness projected loudly at you.
With all this research, we decided on English Chestnut. But SURPRISE twist, in the immediate 60-mile radius, there wasn't a home improvement store with more than 2 gallons of any one color of stain. So we problem solved and purchased a 3.5 gallon bucket, 2 gallons of English Chestnut and 1 gallon of Early American. Buying the stain this way meant the ratio would be easy to replicate. 2:1.
We also had to deal with the fact that these floors were dry and thirsty. Pine is already prone to splotches—due to uneven acceptance of stain—and these were dry pine floors, so we knew we needed to do something.
I asked around and found Minwax also made a wood conditioner that could do the job for us. Three gallons of that were purchased, as well as stain pads and floor polyurethane.
Choosing a Sealant
DONT THINK CHOOSING POLYURETHANE WAS AN EASY DECISION. This took me DAYS to decide. There are SO many options to seal wood floors. The classic, period-correct options included Tung oil/Waterlox, wax and paste, and Shellac. Modern options were oil-based polyurethane and water-based polyurethane.
I'll take you down the same rabbit hole I went down, because who doesn't love being overwhelmed by options and choices?
"Period Correct"
Tung oil and Waterlox are oils that did a great job waterproofing floors 100 years ago. When applied properly, the oils penetrate the wood until the boards can accept no more, creating a waterproof, low-luster finish. With Waterlox in particular, the oils can be reapplied at any time and will melt into previous layers, meaning dings can be touched up throughout the years.
Problems with these methods include....1. this stuff is EXPENSIVE. 2. very smelly 3. hard to find in large quantities and 4. and finicky to apply. So while I did give waterlox some serious consideration, it was just so cost-prohibitive.
Wax and paste require monthly maintenance, so those were instantly off the table.
Shellac gets really yellow (or "ambers") with time, so that was off the table.
Polyurethane
Compared to the older methods, which focus on really sinking into the wood polyurethanes form the waterproof barrier by sitting on top, with finishes ranging from satin to high-gloss.
Problems with poly....1. Requires coats of poly be applied within limited windows. No sooner than 3 hours, no later than 12. 2. Can't have additional coats applied without sanding, otherwise, the layers won't bond and will create flakes and chips. 3. can show imperfections if applied incorrectly because it's "sitting on top" instead of penetrating the wood.
We decided we could handle the downsides of poly, and elected to go oil-based, mainly because it's cheaper. Water-based (also known as Polyacrylic) is easier to work with, but significantly more expensive. I also don't trust water-based anything. Water is weak.
Cleaning the Floors
This took another day of work. Thankfully, we were able to borrow a backpack vacuum from the family which sped up the process, but getting rid of all the dust was important. We didn't want anything to wreck the final finish, so we took our time.
After the run with the vacuum, we used a Swiffer to wipe down all the walls and baseboards, then swiffered the floors themselves
During the final clean, I started noticing some of the spots we'd filled with putty weren't cleaning up well. We could still see some of the putty sitting on top of the boards, which could prevent the stain from getting to the wood. Cole hypothesized they were spots where he'd gotten the glue to sawdust ratio off.
As I passed the spots, I use our Ryobi palm sander to knock them down and rubbed with denatured alcohol to give them a final clean. We thought that was the end of it.
Side note: denatured alcohol is great for cleaning raw wood. It evaporates quickly and creates a super clean surface.
Staining the Floors
Finally, it was time to do the fun part! Stain the floors!
We started later in the evening, which in retrospect was super dumb, but I was desperate to get going, so Cole indulged me.
Cole kicked it off by applying the wood conditioner with a paint pad on a stick. After it had settled in (about 15 minutes) I followed behind with stain on a paint pad and stick.
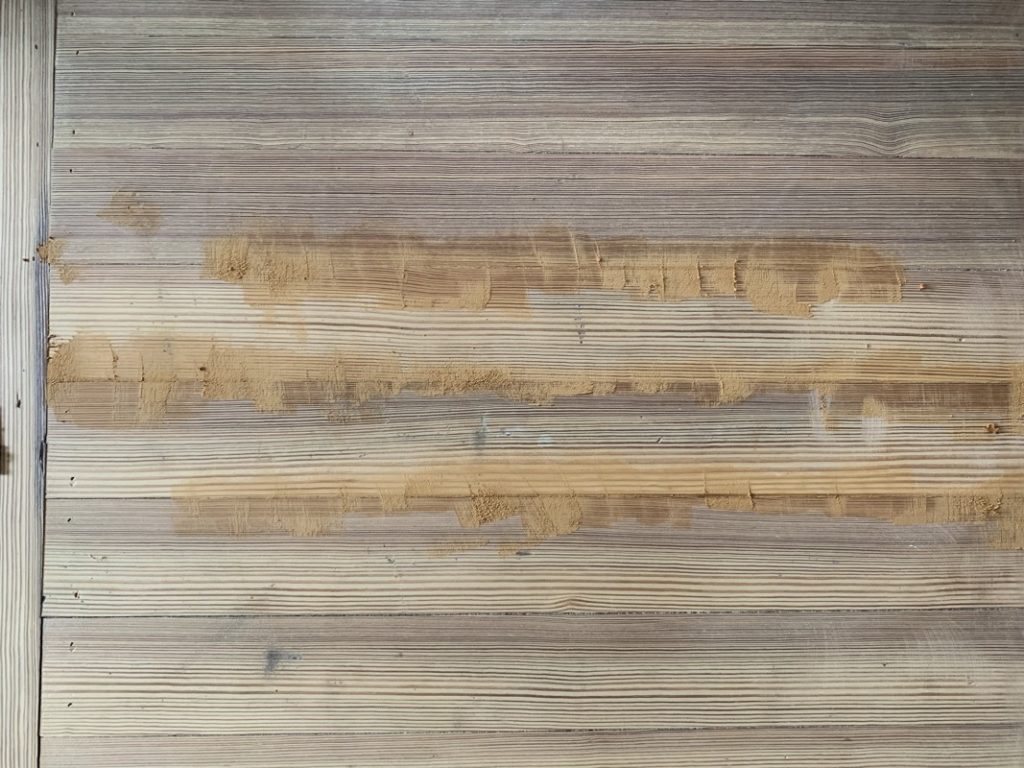
I applied the stain, and given my past experience with stain, assumed it would absorb right away and wouldn't have excess to wipe off. To be fair, I'd actually applied stain to pine floor before, using this exact method, and it had worked great. BUT the wood conditioner was doing its job so well, I noticed after about 20 minutes of application, there was WAY too much stain on the floors.
I started rushing around trying to wipe up leftover stain, but it had already turned into a sticky mess. The floors were dark...TOO dark. Way darker than any of the tests. We'd messed up.
So while I was trying to figure out if we had to stick with the darker, gunky floors, I noticed a few weird splotches.
By this time, it was 9:30PM and I couldn't see super well. So I called Cole back into the room and asked if he had noticed anything. He saw them too. It seemed there were whole bunches of light splotches. We were tired, overwhelmed, and discouraged, so we decided to stop what we were doing and evaluated when we had daylight.
The Big Mistake
In the cold light of day, the splotches were worse than we thought.
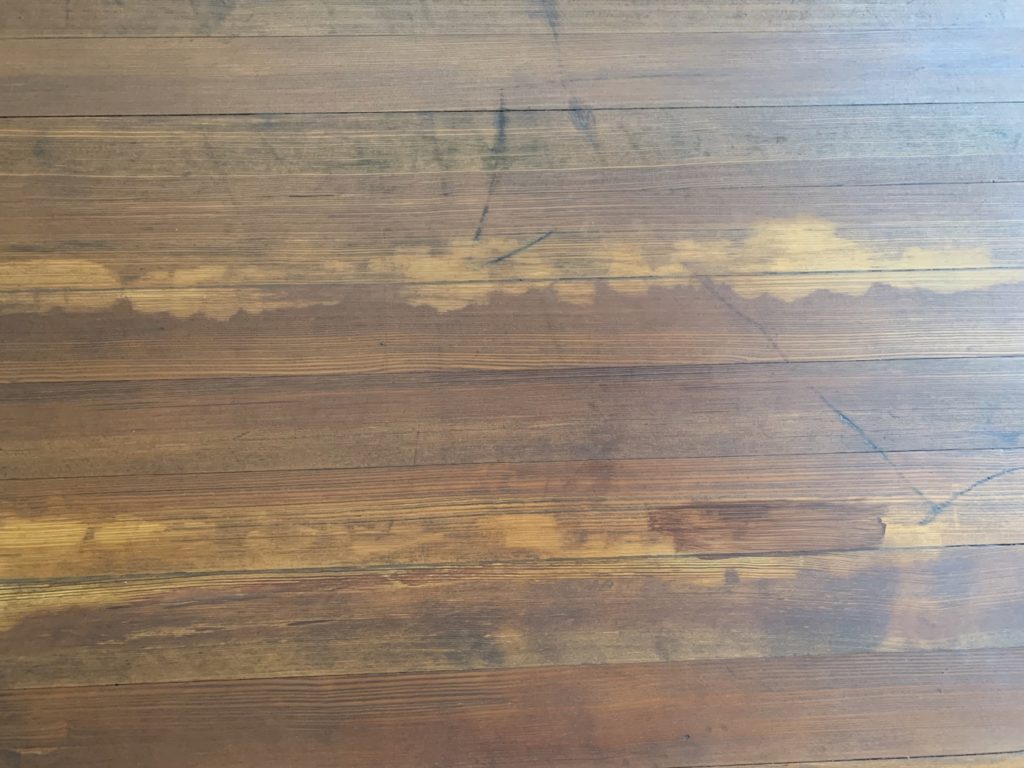
It was then I realized what had happened. The spots I'd sanded and cleaned, the spots where I'd thought there was too much remaining putty, had essentially been "buffed" into the wood. That meant the stain wouldn't penetrate and left these AWFUL splotches all over our floor. We'd only stained about one room, so while the damage was limited, we had no idea how many spots were in the other rooms.
We attempted various fixes. Cole borrowed a more high-power palm sander from his parents which got the glue up, but kicked out a TON of dust. Enough dust that we were left wondering, what was more work, running around with a palm-sander guessing at where the splotches were or running the floor sander again?
After all the work thus far, after all the vacuuming and cleaning, we made the hard decision to start over. We took a few days off to clear our heads, but ultimately knew we wanted the floors to look their best, and that meant starting over.
That meant renting the floor sander again, running it with all three levels of grit, and doing the whole cleaning process again. But with how far we'd come, we just couldn't stomach letting the splotches stay.
Starting Over
Again, Cole drove the 45 minutes to nearest Menards to rent the orbital sander. We elected to not rent the edger again, it seemed the edges were largely unaffected, and now that we'd realized there were palm sanders out there with more juice in them, we knew we would never rent that heavy piece of crap again.
Within 2 hours of running the sander with 36 grit paper, the sanding discs started falling off. And kept falling off. And next thing we knew, Cole was driving back to Menards to get replacement pads. While we love Menards, renting their equipment was a nightmare. Take it from us, double-check everything is in working order.
When he finally had a working sander, he ran it through the entire process for the second time. 36, 50, then 80, and after a solid 14 hours of sanding, it looked like the splotches were gone. While Cole returned the sander, I ran the backpack vacuum and swiffered everything, again.
Staining. Again.
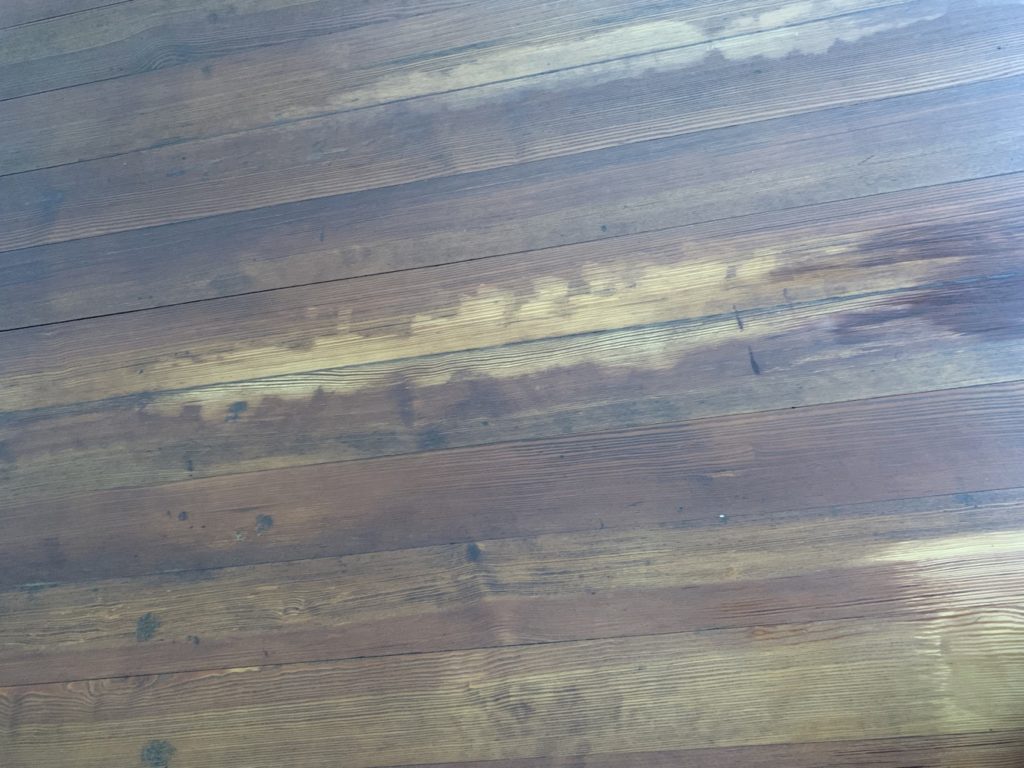
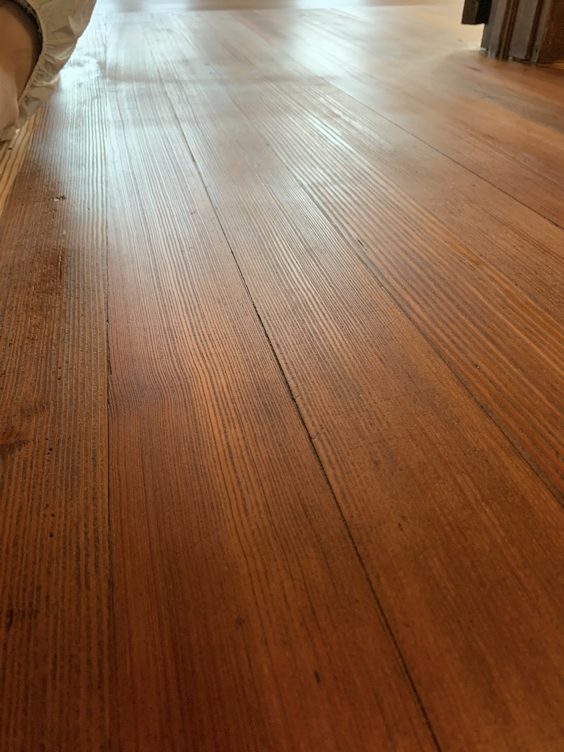
This time, we called in reinforcements from the family, grabbed a few pairs of kneepads, and applied the wood conditioner and stain on our hands and knees. The wipe-on wipe-off method left us with a MUCH better finish. The color was rich, without being dark. Almost ALL the splotches were gone and we could not have been happier.

While we're talking about it, here's a few tips for staining floors.
- Stir the stain often. It quickly separates and will ruin the overall look. So mix it up!
- Use a wood conditioner if you're working with pine. We used way less stain than we'd thought and got a better result.
- Start with less, it's always easier to go darker later.
Ok, we're so close to the end! Next time we'll get to see the before and after shots, which I know is what you're all waiting for.
I would have been on the floor sobbing...lol Good for you having such tenacity!
[…] can read parts one, two, and three if you need to catch […]
Thank you for this wonderful piece. I also have the quarter sawn heart pine floors in my old house and I really really do not like this wood. Was hoping to find a way to prevent the red from bleeding through as I do not like the red tones. Perhaps I can stain it dark as you were trying initially. Will keep looking.