Refinishing Wood Floors from 1914 | Prepping and Sanding
Welcome back! If you haven't already read part one, check it out here!
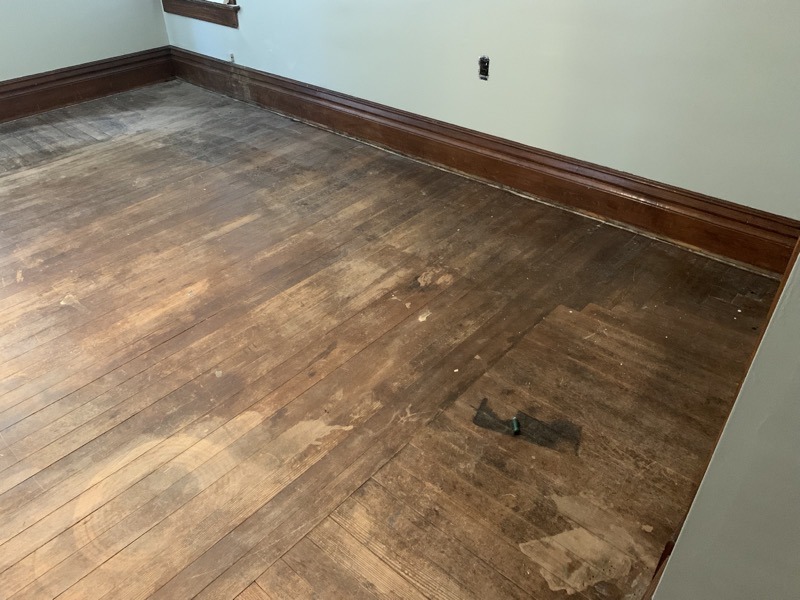
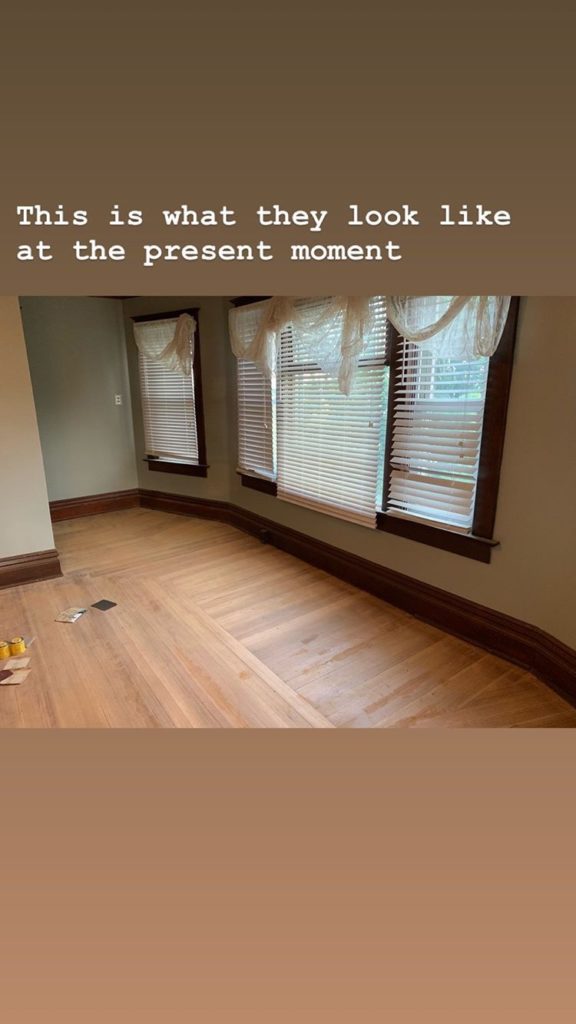
After establishing our game plan, and a solid two weeks of wallpaper removal and drywall repair, we finally got to pull up the carpet all the way, move all the furniture out, and clean the floors.
We used an industrial cleaner, borrowed from Cole's parents, to speed up the process. Believe it or not, the floors below are CLEAN. The cleanest they've probably ever been.
The next step took some time. Cole searched high and low, through our attic, nearby barns and sheds, and the basement until he found similar wood. At this point, we weren't sure what species we were working with, so we went with our best guess—some kind of pine. We'll get into the type of wood later.
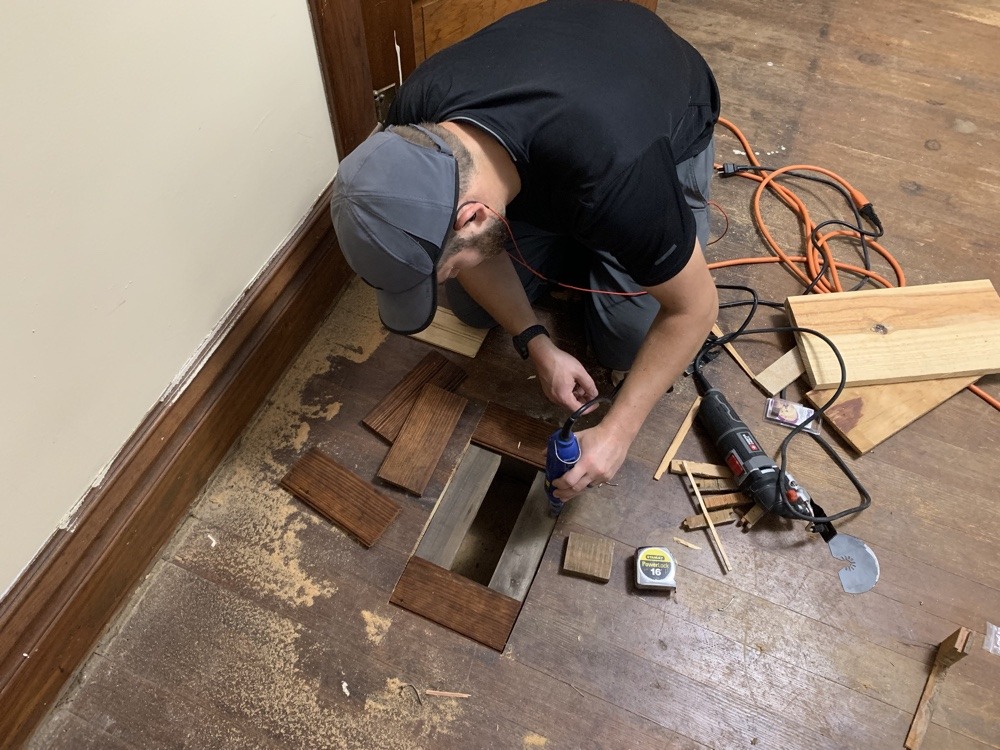
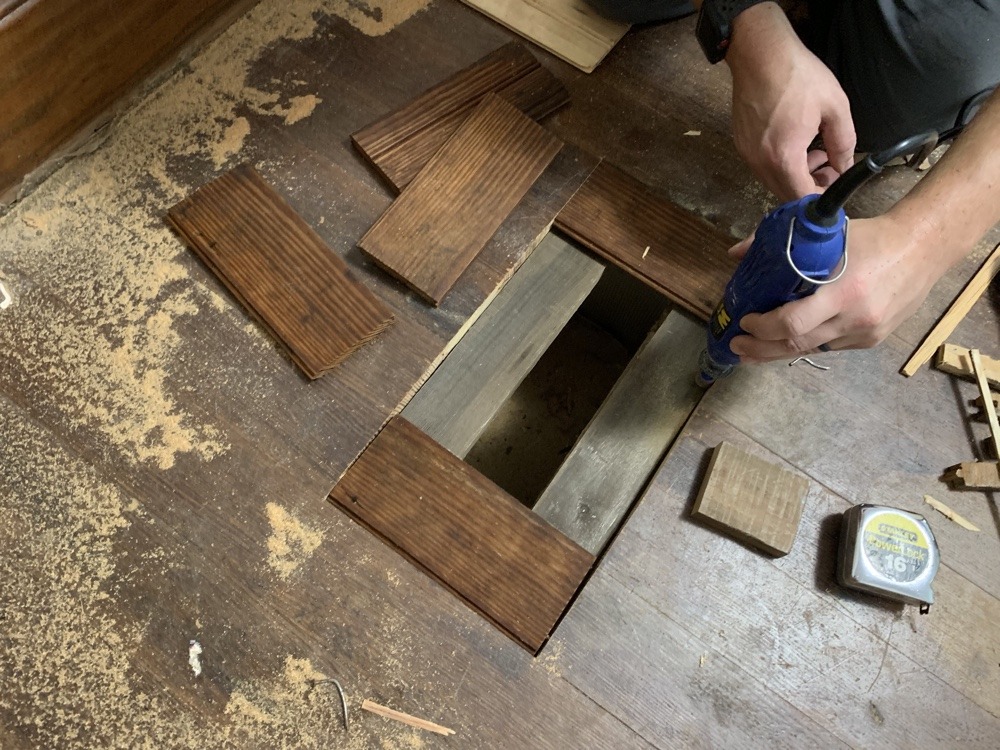
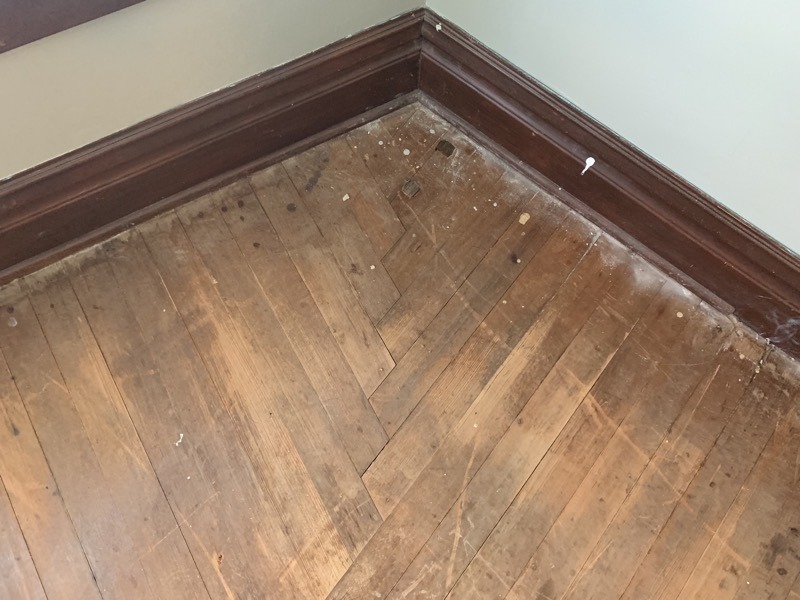
Cole patched up radiator holes and one old vent using a hodge-podge of methods he found on the internet, mostly from Bob Villa. We didn't have any "finger lacing" on our second floor, instead, we had patterns typical of Victorians.
Back in the day, these people really knew how to look rich. One of their favorite things to do was lay floorboards to highlight how much money they had, while not wasting money on floorboard no one would see, e.g. where rugs would go.
Which is how they arrived at the STUNNING herringbone corner joints. These would later become the biggest pain the ass, but when it came to patching the floors, we had some flexibility.
This is a great time to chat about our goals for these floors. We are not historic purists. We work hard to honor and restore the history and character of our homes without sacrificing convenience, cost, and/or our own preferences. We resolved to do the work necessary, and to use the right tools, to get the floors clean and protected. Because these floors were laid in 1914, we wanted to keep "patina" wherever it made sense. Gouges, marks, and patches were totally ok with us. It reminded us of the history of the house. We didn't want them to look "new."
And on the other side, we weren't going to use the exact methods used to finish floors in 1914, partly because they can be unsafe, VERY expensive, and require a great deal more care.
So we struck a balance of "preserve what we can, update what we need." For patching holes in the floor, this meant we were totally a-ok with the patches being visible, but they had to be secure, clean, and built to last.
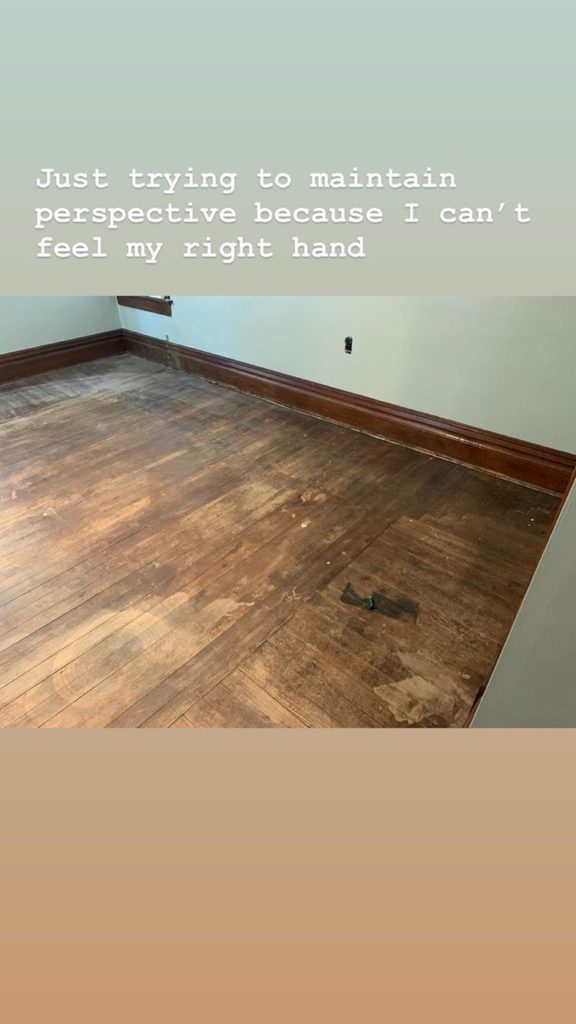
Our last step was to remove the quarter round and pick a day to start sanding.
Sanding the Floors
It's a good thing we just had a talk about goals for the floors, because selecting how to sand required we know exactly what we were looking for.
Option #1: Belt Sander
If you were to call a professional to refinish your floors, they'd probably bring in this big poppy.
A belt sander, as the name indicates, uses a belt of sandpaper, running in one direction, to "cut" away at the wood. These are fabulous for bringing wood floors back to their original glory. They will level the floors and remove enough wood to completely disintegrate any gouges, bumps, or bruises. (Floors don't get bruised, it just felt right)
Belt sanders require the operator move them in the direction of the wood grain at all times, consistently and without pause, and to know what the heck they're doing. If you've ever heard someone describe "destroying" their floors when trying to DIY a refinish job, they were probably using a belt sander.
Option #2: Random Orbital Sander
Slightly smaller in size, a random orbital sander uses three sanding discs to "grind" away at the floor. Because the discs are random (and orbital), it doesn't matter what direction you run the sander and it takes off less material in a single pass.
Typically more beginner-friendly, these sanders are ideal for removing old finish, but won't take too much off the floors themselves. Overall, harder to mess up your floor with an orbital sander, but slower-moving, and won't take you down to totally fresh floors.
Option #3: Edger Sander
Another rentable sander, this guy has a spinning disc designed to get into the nooks and crannies where your floor sander can't reach.
Option 4: Palm Sander
This little guy has been in our arsenal for a while, so we figured he'd come out no matter what. Obviously less powerful, and would require knee pads to run it.
The Winner?
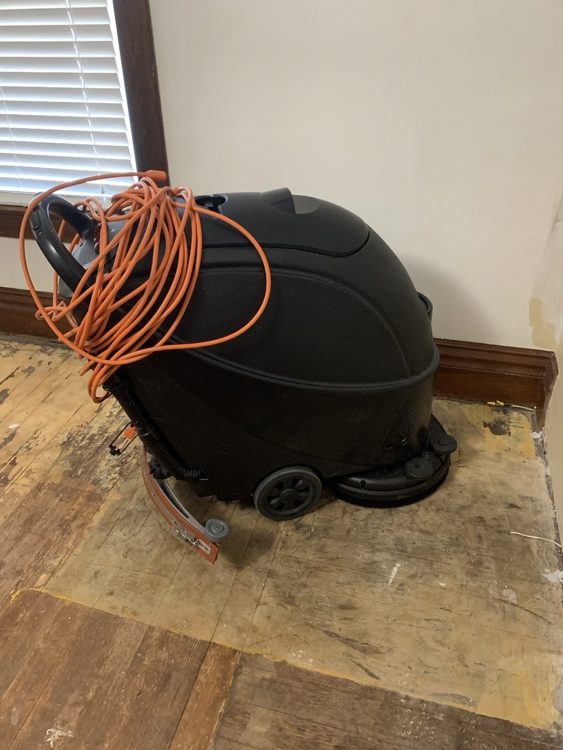
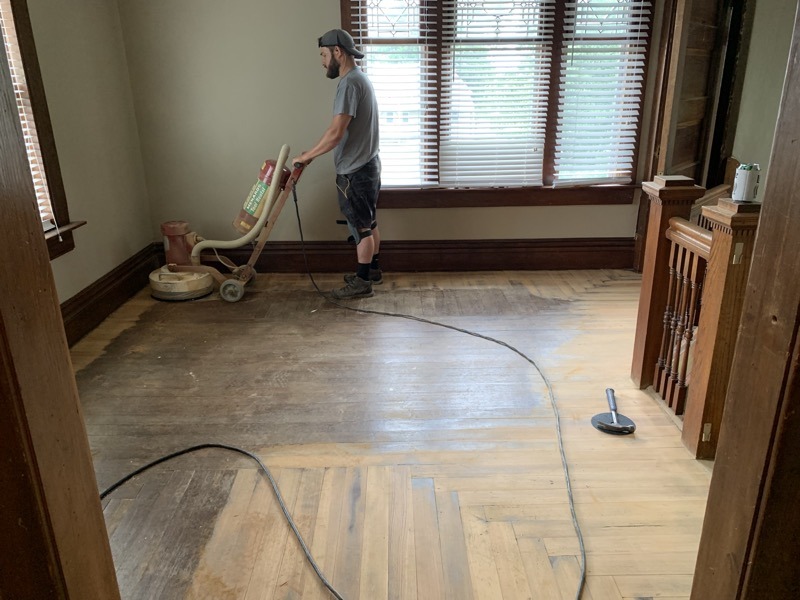
The Orbital Sander and Edger Sander combo. Because our floorboards run in various directions, using a belt sander was a terrifying notion. The orbital made the most sense to refinish and preserve the history of our floors.
Early on a Saturday morning we drove the 45 minutes to nearest Menards and rented both for the weekend. We also bought around $200 worth of sandpaper, 36 grit, 50 grit, and 80 grit for both the orbital and the edger.
Let's take a break and talk about the grit of sandpaper. If you've ever worked with sandpaper before, you've probably never gone below 80 and have gone as high as 220 to get a smooth finish on smaller projects.
I was thoroughly confused as to why floor sanders apparently followed totally different rules. So here's what I learned.
The lower the grit, the rougher the sand. The 36 grit would grind away more material, removing the finish and small amount of the floor, leaving a rough finish. The next step up, the 50 grit, begins the smoothing process, knocking down all the rough stuff brought up by the 36 grit. The 80 grit then smooths and begins to seal the pores of the wood.
What? Pores?! Yup. That's the most important thing I learned. When using floor sanders, with their heft and power, the smoothing ability of the sandpaper is exponentially increased, creating a smoother finish with lower grit. Wood is incredibly porous (which is why it swells when wet) and the smoother the surface, the smaller the pores.
So IF we used a high grit, anything above 150, we could inadvertently make the pores so small the floors would be incapable of accepting stain. Weird, right? Anyway, back to the story.
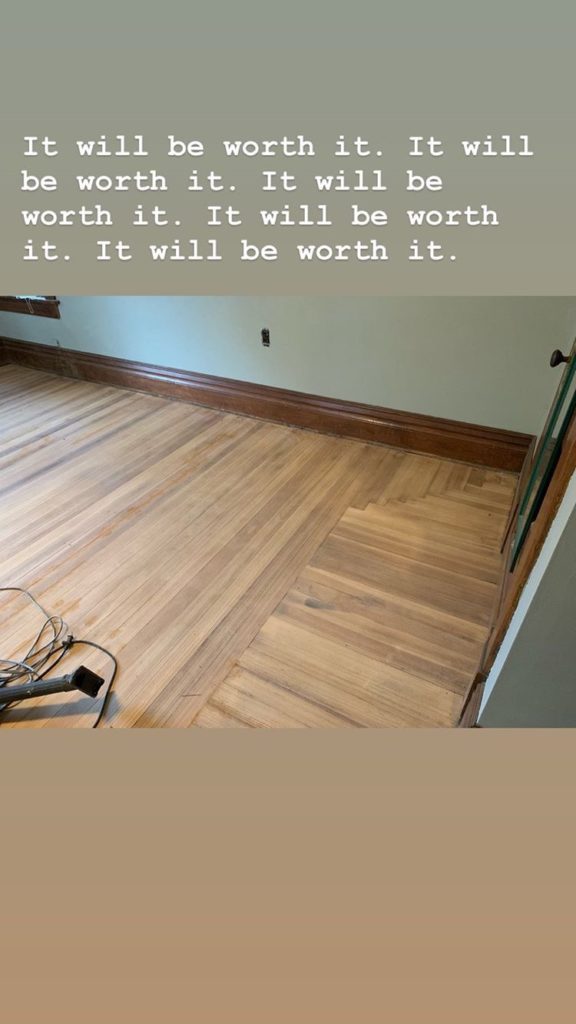
We hefted the sander upstairs and did our first pass with 50, just to get a little taste of the power.
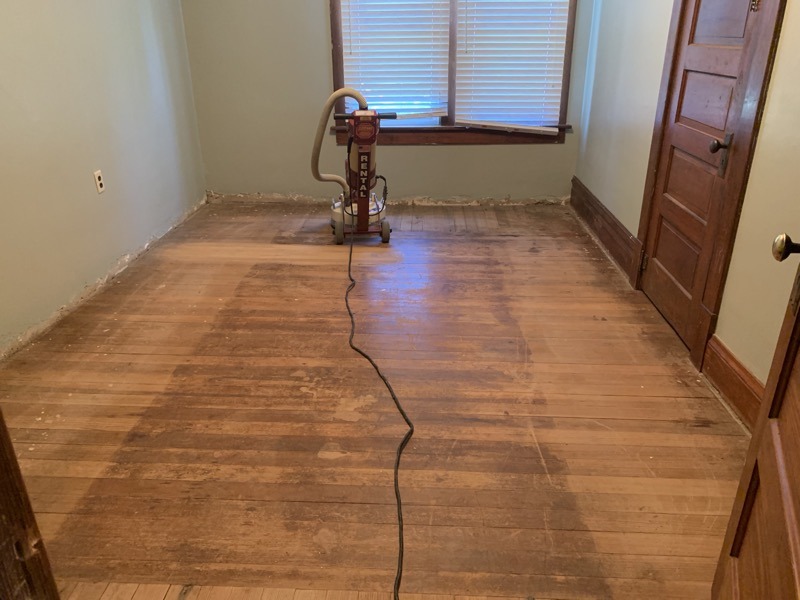
We were ecstatic. In just one pass we could see the beauty of the floors smiling back at us. We slapped on the lowest grit and Cole got to work.

While he ran the sander slowly in each room, I pulled out the edger sander. This guy was NOT small and did NOT work.
Something was wrong with the wires, so while Cole ran the floor sander, I drove the 45 minutes back to Menards to rent a different sander. I wasn't pleased.
While I was there, I bought ALL the sandpaper they had, because after just a few passes, Cole discovered we'd need more sandpaper. A LOT more.
That night, I donned knee pads and got to work sanding the edges and had our first rotten discovery. The edge sander was heavy, hard to handle, within a few minutes, had left gouges in our precious floors. We quickly learned the edger HAD to run with the grain of the wood, which was wildly inconvenient because ALL of our floor boards run perpendicular to ALL baseboards. Meaning, we had to do little bitty runs with the 40 pound sounder, without applying any additional pressure.
Most people, with more modern floorboards, could run the edger along the baseboards for at least half of the room. Because these old-school people HAD to show off their wealth, we couldn't run it straight across ANYWHERE.
We ended up with a stance that kind of resembled a sumo-squat/kettlebell swing. And I still managed to create several gouges. It was incredibly disheartening, tedious, and exhausting work.
At one point, we pulled out our little Ryobi palm sander to see if it could do the job instead, and we're bummed to see it didn't have the power to match the porous level of the floor sander. Again, if the edges weren't the same level of sanded as the rest of the floor, we'd be left with visible lines.
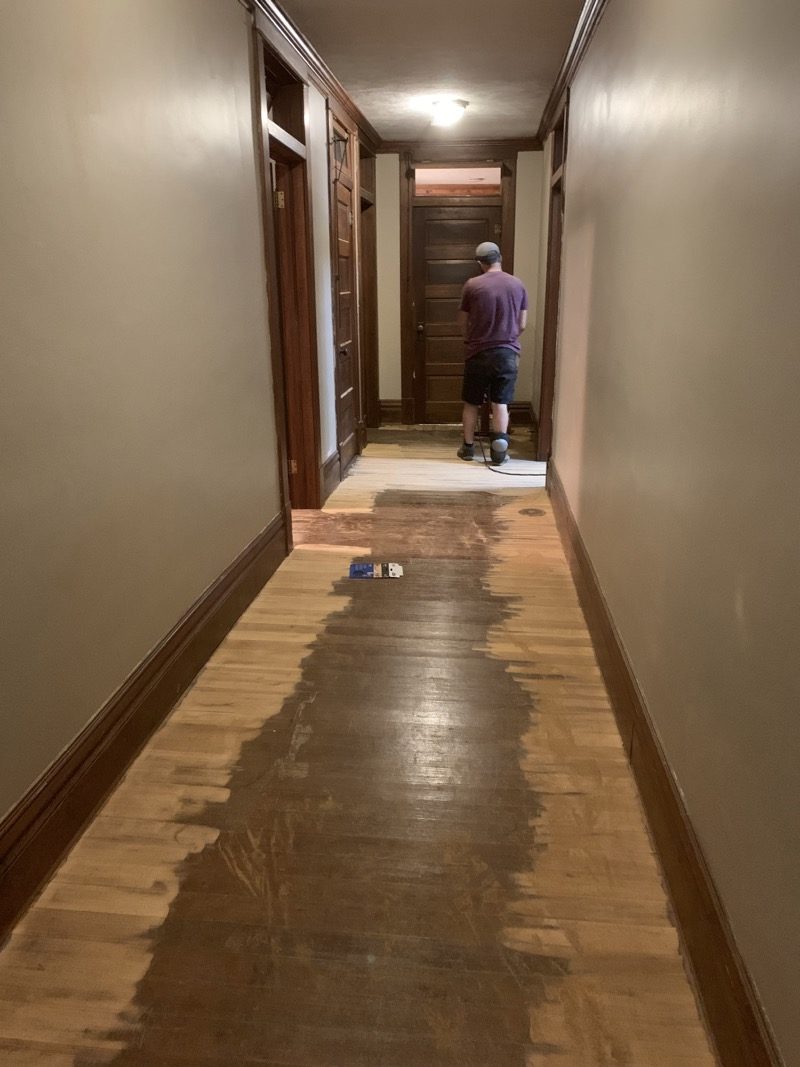
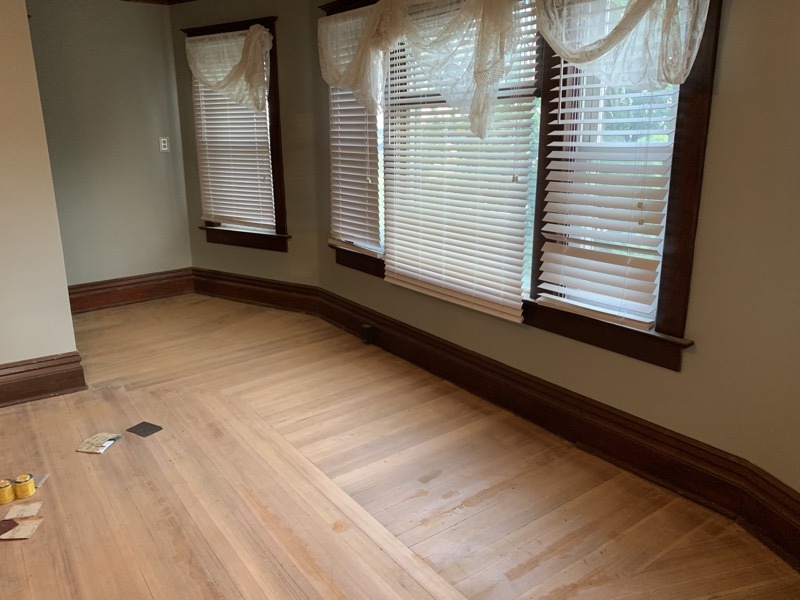
After days of sanding, we arrived here.
Oh I almost forgot! We got REALLY lucky, and the glue we found in the back room was old and brittle and sanded right off. I chipped away at it manually, but ultimately, let the floor sander do the work.
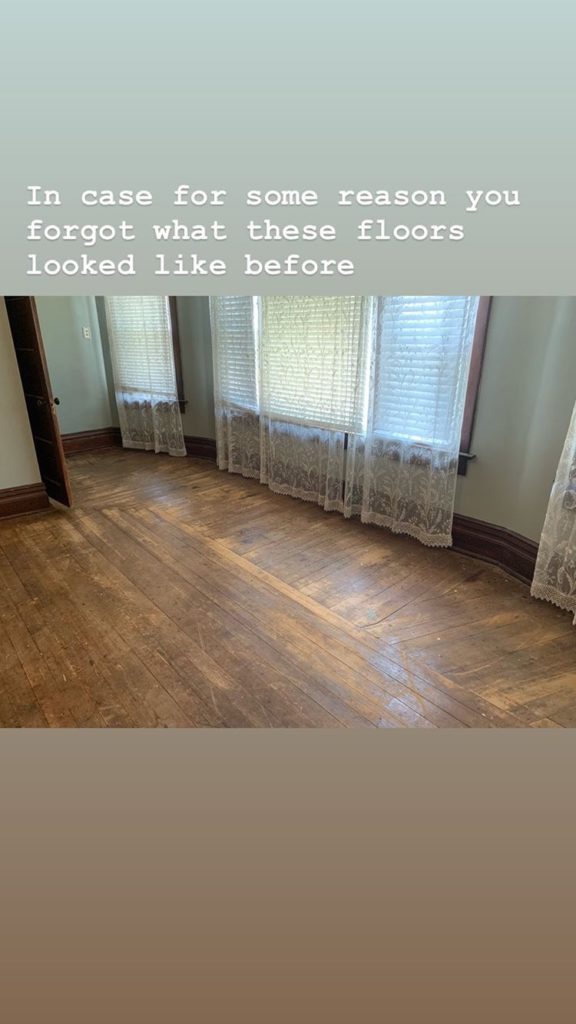
Side note, these photos are from my Instagram stories. If you want to watch more of this real-life mess AS IT HAPPENS IN REAL TIME, you can follow along there and keep an eye out for new stories. Warning, I do curse on occasion, but wouldn't you if your floors were taking this long!?

Filling Gouges and Cracks
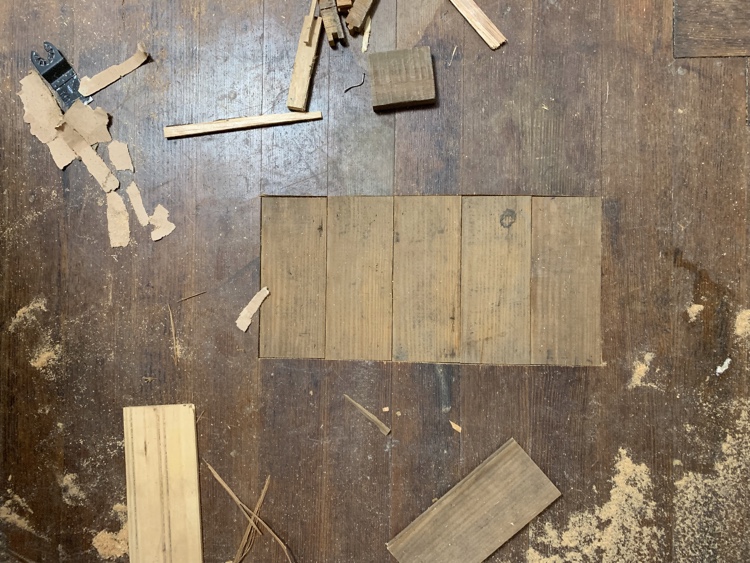
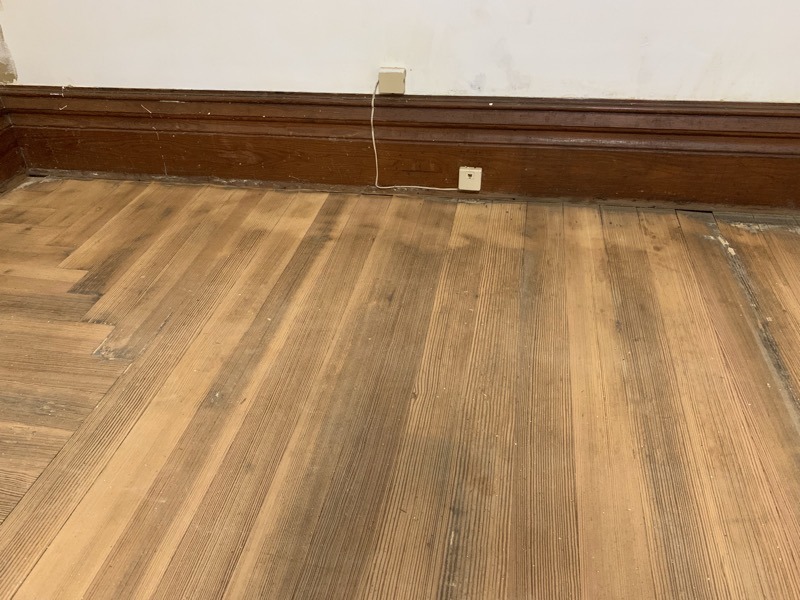
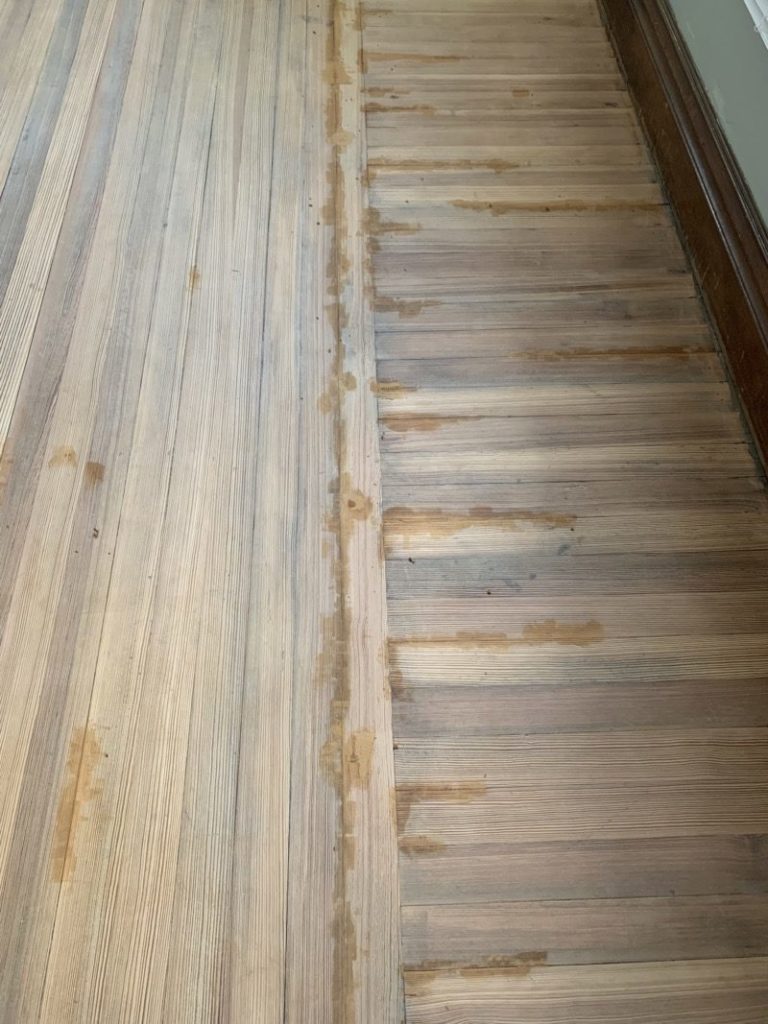
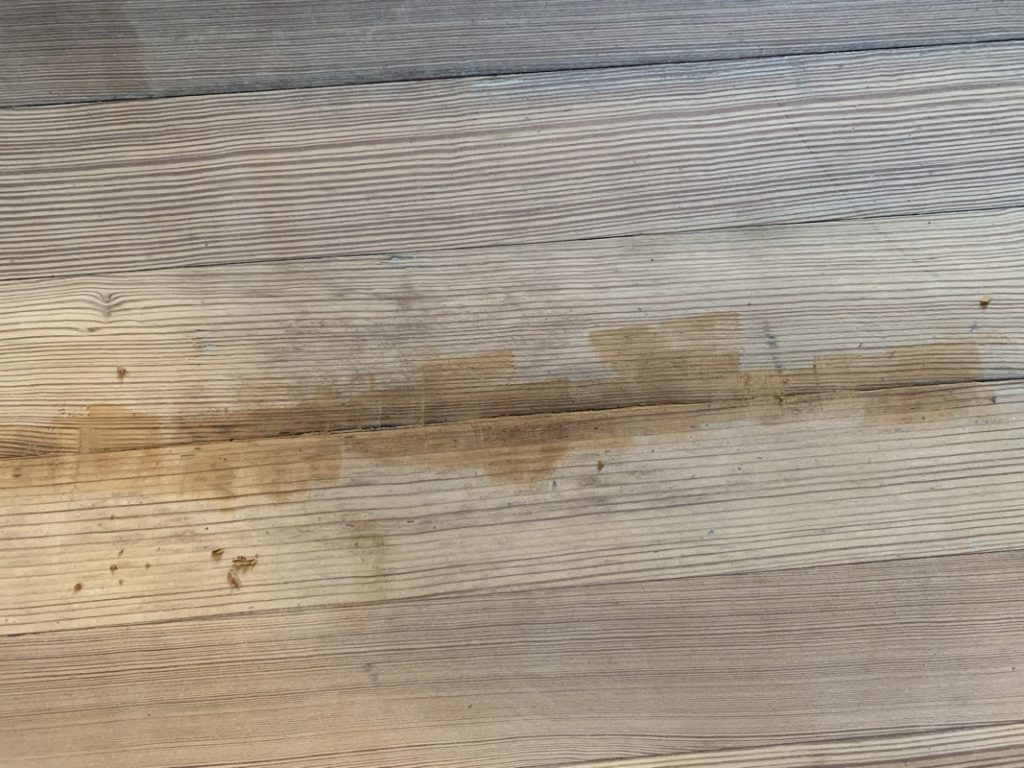
Again, we weren't going for perfection, but big cracks and gouges don't allow for cleanliness. We tried using "Wood Filler" from the carpentry section but discovered quickly it didn't even kind of stain to match the floor, regardless of what the label said it would do. (picture below shows some light patches where we tried to pre-packaged putty)

Instead, Cole did some research and found the professionals typically mix sawdust from the sander with wood glue to make a custom wood putty.
So between running 50 grit and 80 grit, we ran around filling cracks. To keep things consistent, we used a penny to decide if the crack was big enough to justify filling. If the penny fit, fill it. If it didn't, we left it.
After letting it dry for 12 hours, Cole did the final pass with the orbital sander, sanding down the putty on the surface, leaving only the putty in the cracks.
P.S. We also used a little oscillating sander to hit the tiny little corners, but only in a few places.
In total, it took us (mainly Cole) 6 full days of sanding. With the first few passes of the sander, we genuinely thought that everyone had been exaggerated when they said our house would get dusty. It wasn't that bad!
Until we hit the 80 grit and oh my dear father in heaven was our house dusty.
We assume the dust was so fine the vacuum attached the sander couldn't catch it, or maybe it was just accumulating right at the end, but whatever, it was EVERYWHERE. I regularly had to wipe my computer screen off while working, even though I'm on a different floor. It was a dusty, grimy mess.

But alas, we were finished. Cole happily drove to Menards to return the sanders and with great joy, we began cleaning.
But little did we know just how quickly our moods would turn.
To be continued....
You guys are pathetic. Arrogant to think you even had a clue on how to do this.
And they learned from it and can share the pains of the journey which they finished a bit wiser...and that's not in the least pathetic.